With the tutorial we’re going to see you can learn how to interface many components with Adobe Photoshop and then add them to your projects as a graphic element. At the end of this exercise, you will have the complete interface of a professional car satellite navigator. A very detailed and easy to follow lesson for users who already have a good knowledge of the program.
Related Posts
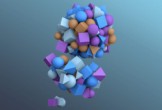
24
Jan2014
Particle Swarm Effect in Cinema 4D – Tutorial
In this video tutorial, he shows you how to create a particle swarm effect just using the cloner and effectors tool in Cinema 4D. An exercise that can come in…
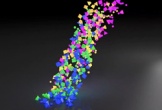
13
Oct2014
Creating Cluster Effect in Cinema 4D – Tutorial
This video tutorial shows how to create a cluster effect in Cinema 4D. We will use the Cloner Object and the Attractor, Dynamics. Finally, the lighting of the ‘Cluster’ obtained…
12
Dec2012
Modelling a Nescafe Mug with 3Ds Max
In the tutorial we’re going to see this time we will be shown how to make a cup of Nescafè 3D using the Autodesk 3ds Max modeling and rendering program.…
11
Jan2013
Making Snow in Maya 2010 Tutorial
What we’re going to follow is a tutorial with Autodesk Maya 2010 that explains how to create snow that settles on objects or roads, an interesting lesson if you have…
13
Feb2013
Valentine Day Wallpaper Photoshop Tutorial
Valentine’s Day is coming and on the net there are a lot of tutorials on how to get beautiful images to celebrate this anniversary dear to all lovers. What we…
24
Aug2013
Create a Vector Floppy Disk Icon in Illustrator
Nel tutorial che vedremo imparerete come creare un icona di un floppy disc. Verranno usati metodi di base per la costruzione di forme e numerosi effetti di Adobe Illustrator, che…