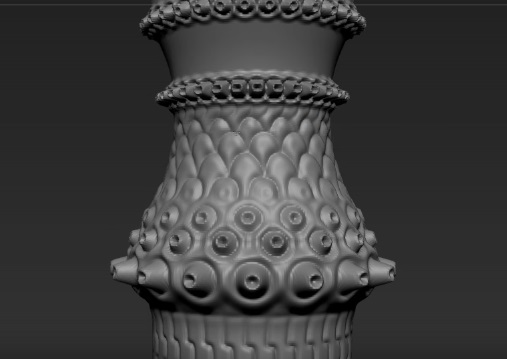
In this beautiful video tutorial we will see how to best use one of the tools of Pxicologic ZBrush to quickly sculpt 3d objects that have a complex surface. These are the radial symmetry that allows you to clone the ZBrush brushes in a symmetric and multiple way on the object. The result is truly incredible.
Related Posts
27
Dec2015
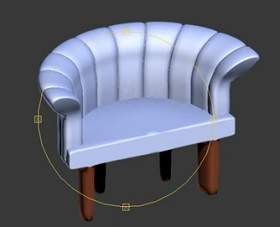
Make a Sofa Chair in Autodesk 3ds Max
This video tutorial shows how to create a Sofa Chair using 3ds Max software. A very complete lesson to create an easy and low polygon 3d model.
07
Mar2013
Create Realistic Water Ripple in 3ds Max
A video tutorial illustrating how to create realistic water ripples in Autodesk 3ds Max. A useful lesson you need when we have a scene in which there are objects immersed…
21
Oct2022
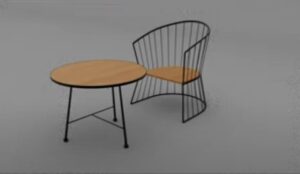
Model an Outdoor Coffee Table and Chair in Maya 3D
This video shows how to model an outdoor coffee table and chairs with Autodesk Maya. Two pieces of furniture with a very classic style for a nice comfortable 3D garden.…
27
Jul2017
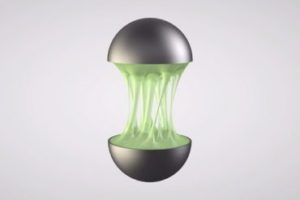
Create Dripping Liquid Slime Effect in Cinema 4D
In this interesting video tutorial we will see an exercise that will teach us how to create a slim effect of dripping liquid in Cinema 4D without using other third-party…
05
Jun2023
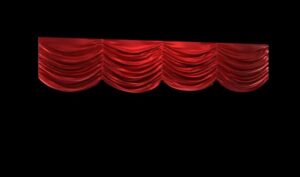
Create Realistic Theater Drapes in 3ds Max
This video tutorial shows how to create a realistic theater curtain with 3ds max. We will see how to make a drape with its many folds. A very detailed exercise…
11
Dec2015
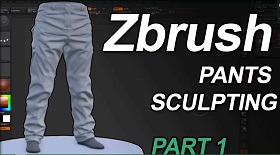
Pants Sculpting in Pixologic ZBrush
This video tutorial shows the process of modeling a pair of pants with ZBrush. The fabrics with their folds are always complicated objects to be redone in 3D. Thanks to…