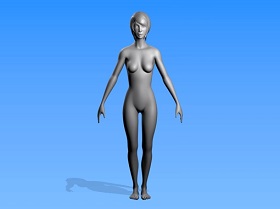
This basic video tutorial in Maya shows how to create the joints and skin of a 3d character with the ‘bearing’ skeleton. This exercise shows how to place the joints correctly to create a skeleton that deforms correctly for the ‘model’, and then shows how to attach the skin to the skeleton and make it ready for posing and animating.
Related Posts
08
Mar2014

Lupin III, disegno da colorare
Lupin III è un manga ideato dal mangaka giapponese Monkey Punch nel 1967, liberamente ispirato ai romanzi sul ladro gentiluomo Arsène Lupin scritti da Maurice Leblanc.{googleads right}
07
Apr2014

Creating Animated Clouds in Maya – Tutorial
This video tutorial shows how to use 3D fluids, changing basic settings, animating 3D textures and with many other tips you can create realistic animated clouds in Maya.
03
Aug2016

Create Best 3D Logo Design in CorelDRAW!
In this video tutorial we will see a nice lesson to create a vector logo with a 3D perspective using the CorelDRAW program! A very detailed exercise that explains how…
08
Jan2016

Create Dissolve Animation in Blender
This video tutorial in Blender shows how to make an animation of text ‘dissolving’ falling apart. The version of Blender used for this tutorial is 2.69. This exercise demonstrates many…
14
Mar2018

Creating a Colorful Glitch FX in After Effects
In this beautiful video tutorial video we will see a lesson that shows how to create a fantastic colored Glitch (noise effect) in After Effects without using third-party plug-ins.
03
Aug2014

Pencil Portrait of Mario Draghi, president UE Central Bank
Mario Draghi (Italian born 3 September 1947) is an Italian banker and economist who succeeded Jean-Claude Trichet as the President of the European Central Bank on 1 November 2011. He…